Cats are excellent at keeping themselves clean, but there is one spot they can’t reach with their tongues or paws: their ears. Some cats have ears that stay clean naturally, while others may accumulate wax, dirt, or debris that can cause problems. That’s why it’s important to know how to clean a cat’s ears and when to do it. Cleaning your cat’s ears at home can help you prevent and detect ear issues such as ear mites, infections, or injuries. In this article, we’ll answer some common questions about cat ear cleaning and show you how to do it in a simple and gentle way.
Why Clean Your Cat’s Ears?
Cat ears are delicate and essential organs that facilitate hearing and balance. They also produce wax to protect the ear canal from dirt, debris, and infections. However, some cats may produce excessive wax or face other issues that hinder natural drainage. This can lead to various problems, including:
- Ear infections: Bacteria, yeast, or fungi can thrive in the warm and moist ear canal, causing inflammation, pain, itching, discharge, odor, and hearing loss.
- Ear mites: These tiny parasites feed on ear canal skin and wax, causing irritation, inflammation, scratching, head shaking, and dark, crusty discharge.
- Ear injuries: Excessive scratching or head shaking due to wax build-up or infections can harm the skin, blood vessels, or eardrum, leading to bleeding, swelling, or rupture.
Regularly grooming and cleaning your cat’s ears helps prevent these issues by removing excess wax and debris, reducing infection and infestation risks, and enabling you to spot any potential problems. However, remember not to over-clean, as it may cause irritation and dryness in the ear canal. Always follow your veterinarian’s advice on how often and how to clean your cat’s ears.
Signs Your Cat Needs Ear Cleaning
In most cases, cats have naturally clean ears that require no intervention. However, some cats may need occasional or more frequent ear cleaning, depending on factors such as breed, lifestyle, health condition, or personal preference. Watch out for these signs that may indicate your cat needs ear cleaning:
- Visible wax or debris in the ear canal or on the ear flap.
- Redness, swelling, or inflammation in the ear canal or on the ear flap.
- Discharge that is yellow, green, brown, black, or bloody.
- Foul or yeasty odor.
- Scratching or rubbing of the ears.
- Head shaking or tilting.
- Signs of pain or sensitivity when touching the ears.
- Hearing loss or difficulty balancing.
If you observe any of these signs, consult your veterinarian before attempting to clean your cat’s ears. These signs could indicate an ear infection, ruptured eardrum, or other medical conditions that require professional attention. Your veterinarian can guide you on the proper and safe ear cleaning process.
What You’ll Need for Cat Ear Cleaning
Cleaning your cat’s ears doesn’t require any special equipment. You’ll need a good quality ear cleaning solution, some cotton balls or gauze pads (avoid cotton swabs), a towel or blanket to keep your cat calm, and some treats to reward your furry friend. Additionally, a container of warm water is useful to warm up the ear cleaning solution before use.
Remember to avoid using products not meant for cats or containing alcohol, hydrogen peroxide, vinegar, or harsh ingredients, as they can harm your cat’s ears.
Step-by-Step Guide for Cat Ear Cleaning
Cleaning your cat’s ears may seem challenging at first, but with patience and practice, it becomes a breeze for both you and your cat. Follow these steps:
1. Choose a quiet and comfortable spot where you can sit with your cat in your lap or on a table. Wrapping your cat in a towel or blanket can keep them calm and prevent scratching.
2. Warm up the ear cleaning solution by placing the bottle in warm water for a few minutes. Never use hot water or microwave the solution, as it can harm your cat’s ears.
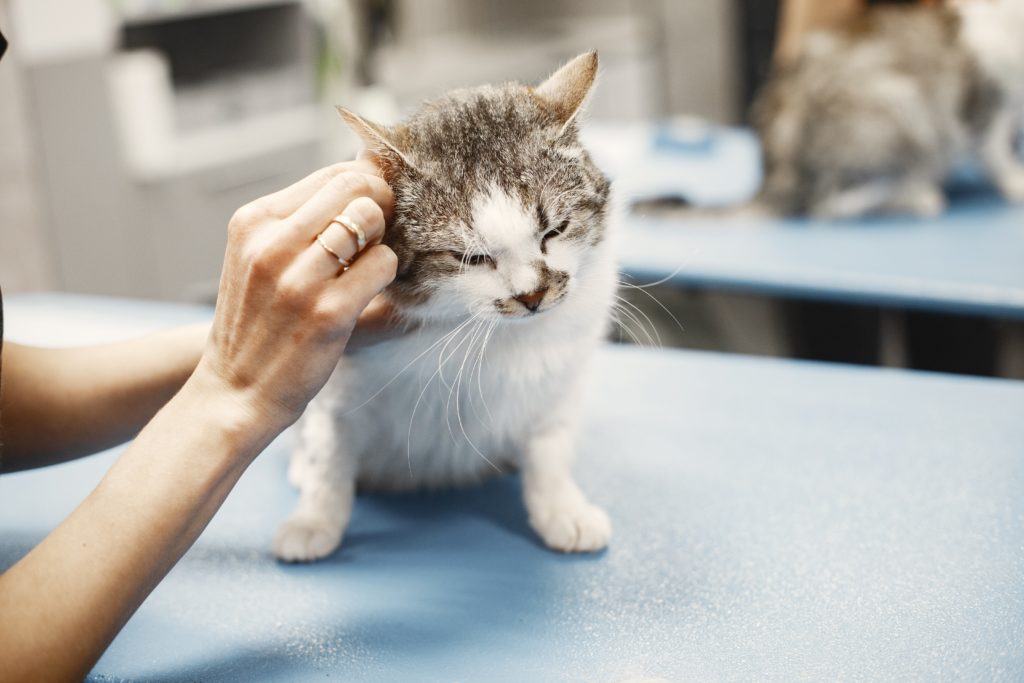
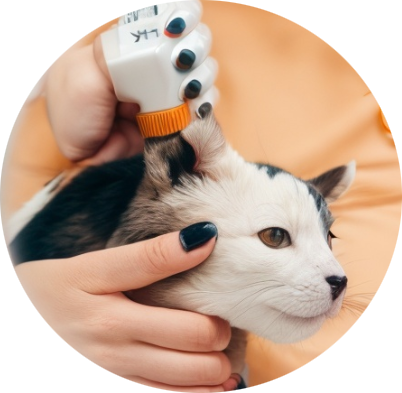
3. Gently but firmly hold your cat’s head with one hand and lift the ear flap (pinna) with your thumb and index finger.
4. Squeeze a few drops of the ear cleaning solution into the ear canal opening. Avoid inserting the bottle tip into the ear canal to prevent eardrum damage or introducing bacteria. Use enough solution to fill the ear canal without overflowing.
5. Massage the base of the ear for about a minute to allow the solution to work around and loosen wax and debris. You may hear a squishing sound as the solution moves in the ear canal. Avoid rubbing too hard or fast, as it can hurt your cat or cause dizziness.
6. Use a cotton ball or gauze pad to wipe away excess solution, wax, or debris that comes out. Never use cotton swabs, as they can push wax deeper or puncture the eardrum. Avoid probing too deeply into the ear canal to avoid missing debris further inside.
7. Repeat steps 3 to 6 for the other ear, if necessary.
8. Reward your cat with treats and praise for being a cooperative patient.

How Often Should You Clean Your Cat’s Ears?
The frequency of ear cleaning depends on your cat’s individual needs and your veterinarian’s recommendations. Some cats may need weekly, monthly, or occasional ear cleaning, while others may not need it at all. Factors influencing cleaning frequency include:
- Breed: Breeds with more folded or hairy ears, such as Persians, Himalayans, Scottish Folds, and American Curls, may require more frequent cleaning.
- Lifestyle: Outdoor cats, or those living in humid or dusty environments may need more frequent cleaning due to increased dirt and moisture exposure.
- Health condition: Cats with allergies, ear infections, ear mites, or other ear problems may need more frequent cleaning for prevention and healing.
Consult your veterinarian to determine how often you should clean your cat’s ears based on their specific situation. Regularly inspect your cat’s ears for any signs of trouble and seek veterinary advice if you notice anything unusual.
Using Olive Oil for Cat Ear Cleaning
Olive oil is a gentle and natural remedy that can help soften and remove wax and debris from your cat’s ears. It can also soothe irritation and inflammation caused by ear infections or mites. However, remember that olive oil is not a substitute for proper veterinary care and should only be used as an adjunct treatment or preventive measure.
To clean your cat’s ears with olive oil, you’ll need:
- Olive oil
- A dropper
- Cotton balls or gauze pads
- A towel or blanket
| Follow these steps: |
|---|
| 1. Warm up the olive oil to room temperature by placing the bottle in a container of warm water for a few minutes. Avoid using hot water or microwaving the oil, as it can harm your cat’s ears. 2. Wrap your cat in a towel or blanket and hold them in your lap or on a table. Use the dropper to place a few drops of olive oil into one of your cat’s ears. Never insert the dropper into the ear canal to avoid eardrum damage or introducing bacteria. 3. Massage the base of the ear for about a minute to allow the oil to work around and loosen wax and debris. 4. Use a cotton ball or gauze pad to wipe away excess oil and any wax or debris that comes out. 5. Repeat steps 3 to 5 for the other ear, if needed. 6. Reward your cat with treats and praise. |
You can use olive oil for cat ear cleaning once a week or as needed, depending on your cat’s condition and your veterinarian’s advice.
Preventing Ear Problems in Your Cat
Prevention is key to keeping your cat’s ears healthy. Follow these tips to ensure your cat’s ears stay clean and problem-free:
- Regularly check your cat’s ears for signs of trouble, such as wax build-up, discharge, odor, redness, swelling, pain, scratching, or head tilting.
- Clean your cat’s ears as recommended by your veterinarian, using a good quality ear cleaning solution and the proper technique.
- Avoid using products not intended for cats or containing harmful ingredients that may irritate or damage the ears.
- Limit your cat’s exposure to outdoor hazards like dirt, dust, moisture, parasites, and other animals that can cause infections or infestations.
- Trim any excess hair around your cat’s ears to prevent wax and debris accumulation in the ear canal.
- Ensure your cat receives a balanced diet and regular veterinary check-ups.
By following these steps and providing proper care, you can help ensure your cat’s ears remain in excellent health.
With a passion for cats and years of experience in cat care and grooming, I have gained valuable insights and expertise that I want to share with other cat lovers. I believe that every cat deserves the best care possible, and through this platform, I aim to empower cat owners like you to provide the utmost love and care for your feline companions.